1/29/2021

FREE Tutorial Friday - Stampin' UP! Quick & Easy Sympathy Card

Beauty and the Stamper’s Free Tutorial Friday

Quick & Easy Sympathy Card

Order any items in this tutorial at my online store: https://JeanPiersanti.StampinUp.net


Supplies


Stamps:  Heal Your Heart


Ink/Coloring: Versamark, White Embossing Powder


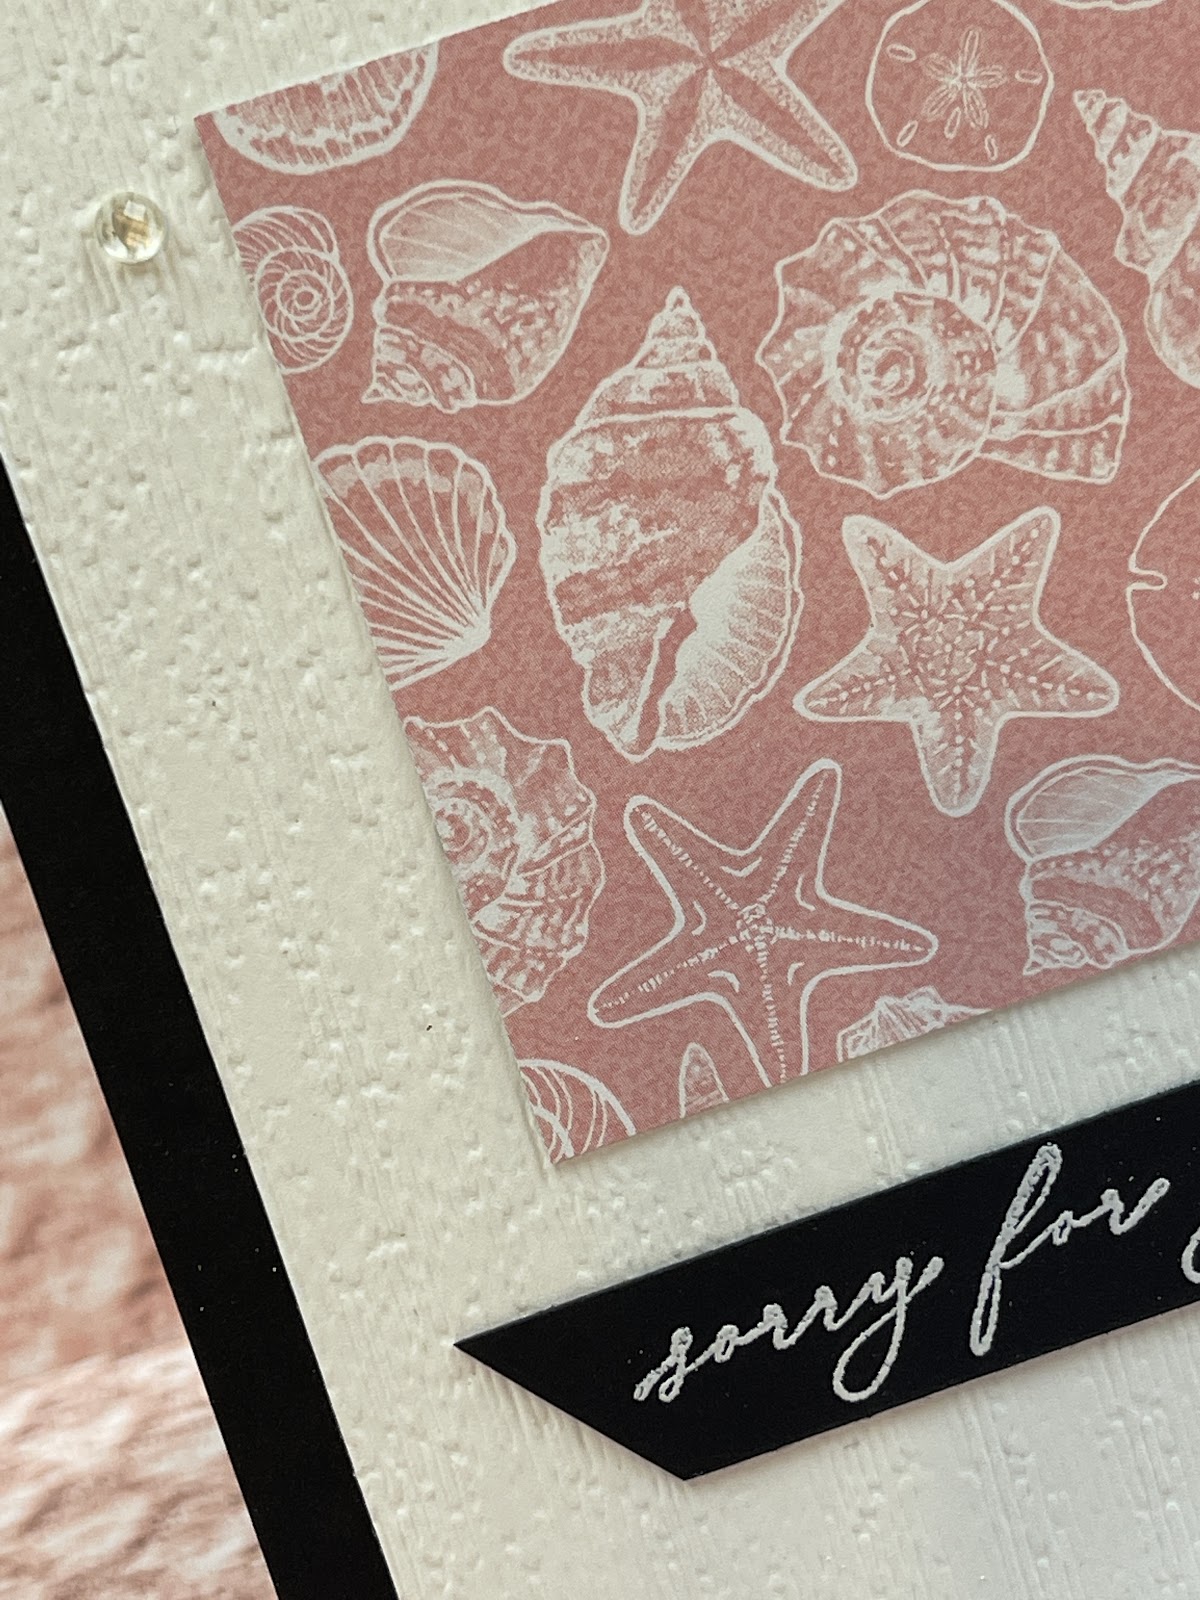
Paper: Basic White, Basic Black,  Sand & Sea Designer Series Paper (DSP)


Adhesives: Stampin’ Seal, 


Dies/Punches: Subtle Embossing Folder


Embellishments: Elegant Faceted Gems


Directions

Cut Basic Black Base at 4 ¼” x 11” Score at 5 ½”

Cut (2) Basic White  at  5” x  3 ¾”

Cut Sand & Sea DSP at 2 ½” x 2 ½”

½” Scrap of Basic Black


Stamp Greeting with Versamark and Heat Emboss with White Embossing Powder on Basic Black scrap..  Run one Basic White piece through the Stamp, Cut & Emboss Machine with the Subtle 3D Folder.  Adhere White layer inside card and white embossed layer on outside of card.  Adhere DSP with a 1” border around the top and sides of Subtle white piece.  Cut  basic black greeting at an angle and adhere to the bottom third of the card.  Your card is ready to add an uplifting sentiment or handwritten words and sent to the recipient..


Product List
Paper Snips
[103579]
$10.00


Make it a Successful Day Beauties!!! ~ Jean Piersanti 
My YouTube Channel: http://www.youtube.com/stampinupgirl 
Post May Contain Affiliate Links

1/22/2021

FREE Tutorial Friday - Fun Fold Z-Fold Birthday Card with Gift Card Holder

Beauty and the Stamper’s Free Tutorial Friday

Z-Fold Gift Card Holder

Order any items in this tutorial at my online store: https://JeanPiersanti.StampinUp.net


Supplies


Stamps:  Oval Occasions


Ink/Coloring: Pretty Peacock


Paper: Basic White, Pretty Peacock, Ice Cream Corner Designer Series Paper (DSP)


Adhesives: Stampin’ Seal, Stampin’ Dimensionals, Multi-Adhesive Glue

Butterfly Gems

Dies/Punches: Double Oval Punch


Directions

Cut (2) Pretty Peacock Base/Covers  at  5 ½” x  4 ¼”

Cut Ice Cream Corner DSP at 5” x 3 ¾”, 1 x 3 ¾”, & 2 ¼” x 5

Cut Basic White  at  5” x 11”  Score at 3 ¾” & 7 ½”

Scrap of Basic White and Pretty Peacock


Stamp Greeting and punch out with Oval Punch, Punch Background with Oval Scallop.  Stamp Birthday Greeting on last third of the Basic White.  Build the front of the card with layers and add scallop greeting with dimensionals.  Burnish basic white on score lines and adhere to the front and back covers.  Punch circle from Gift Card Strip and adhere with multi-purpose glue.  This cute little card is perfect for either gender and any age.


Want to Support Jean Piersanti/Beauty and the Stamper?  


Product List
Paper Snips
[103579]
$10.00

Make it a Successful Day Beauties!!! ~ Jean Piersanti 
My YouTube Channel: http://www.youtube.com/stampinupgirl 
Post May Contain Affiliate Links

1/19/2021

Dollar Tree DIY - Valentine Tray

Oh my goodness Beauty~

I just had to share this adorable tray and accessories that I DIY'd to make my own Valentine's Day Tray.  I feel that Dollar Tree has really stepped up it's game recently and have figured out how many of us are actual DIYers and Home Decorators on a budget.  So with that said, check out all the fun things that came together with a bit of added paint and hot glue.

From This


To This

Want to see how it was all done?  
Check out todays' Dollar Tree DIY video 


Have a wonderful day and I will talk to you in the next post!

Make it a Successful Day Beauties!!! ~ Jean Piersanti 
My YouTube Channel: http://www.youtube.com/stampinupgirl 
Post May Contain Affiliate Links

1/15/2021

Let's make a hand stamped Stampin' Up! card - Free Tutorial Friday

Beauty and the Stamper’s Free Tutorial Friday

Feminine - All Occassion

Order any items in this tutorial at my online store: https://JeanPiersanti.StampinUp.net


Supplies


Stamps:  Strong & Beautiful, Drybrush


Ink/Coloring: Rococo Rose, Merry Merlot


Paper: Basic White, Rococo Rose, Merry Merlot


Adhesives: Stampin’ Seal, Stampin’ Dimensionals


Embellishments/Extras:  Butterfly Gems


Dies/Punches: Scallop Heart, Stamparatus


Directions

Cut Rococco Rose Base  at 8 ½” x 5 ½”, score at  4 ¼”

Cut Merry Merlot at 5 ¼” x 4”

Cut (2) Basic White  at  5” x 3 ¾” 

Scrap Rococco Rose


Stamp Drybrush with Rococc Rose on the Stamparatus, Flip Paper and Stamp again with Merry Merlot onto your basic white layer.  Stamp your greeting with Merry Merlot onto scap paper and punch with Scallop Heart.  Layer all pieces to base.  Add Metallic Mesh and flagged white scrap then heart (with dimensionals).  Add white layer inside card for a clean look.  Add Butterfly Gems to embellish and your card is ready to go!  Save to stamp inside greeting for Valentine, Mother’s Day etc...


Product List
Stamparatus
[146276]
$49.00
Paper Snips
[103579]
$10.00


Make it a Successful Day Beauties!!! ~ Jean Piersanti 
My YouTube Channel: http://www.youtube.com/stampinupgirl 
Post May Contain Affiliate Links