10/30/2020

FREE Tutorial Friday - How to make a skinny card that fits in a #10 Envelope

Beauty and the Stamper’s Free Tutorial Friday

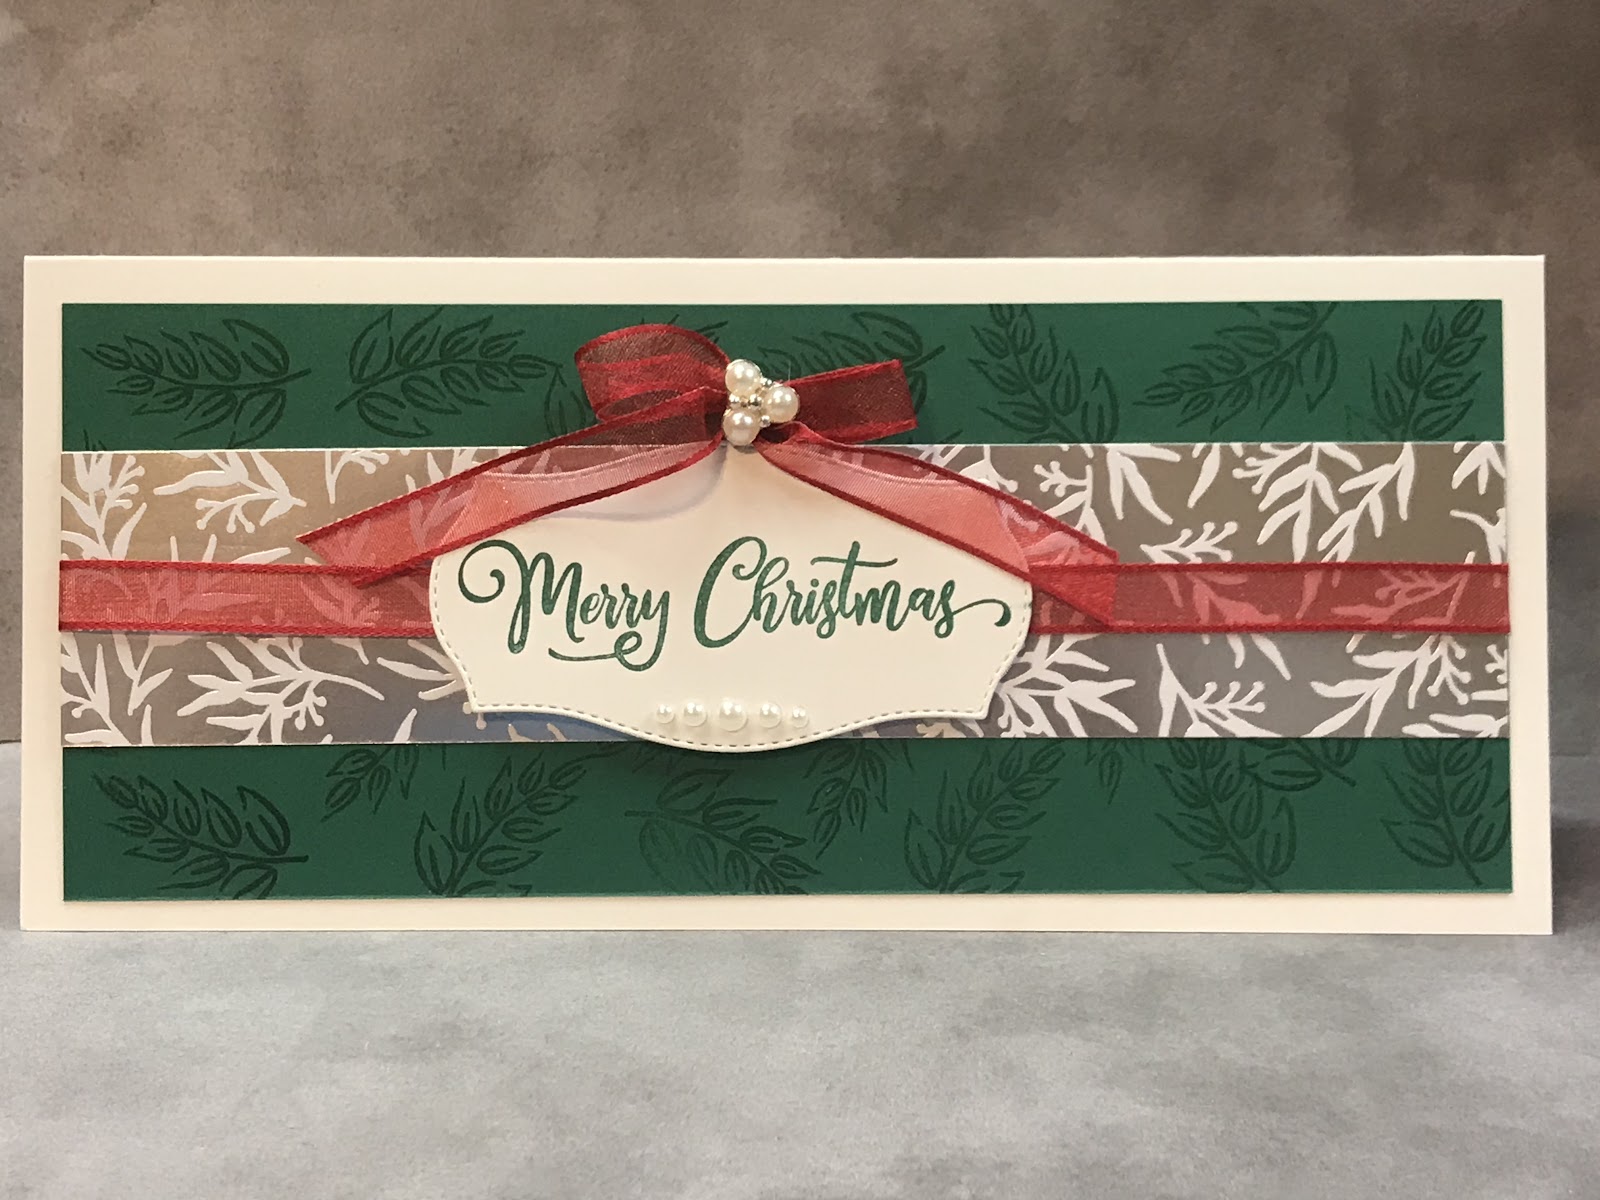
Slimline Christmas Card


Order any items in this tutorial at my online store: https://JeanPiersanti.StampinUp.net


Supplies

Stamps:  Tag Buffet

Ink/Coloring: Shaded Spruce

Paper: Whisper White, Shaded Spruce, Feels Like Frost Designer Series Paper (DSP)

Adhesives: Stampin’ Seal, Stampin’ Seal, Stampin’ DImensionals

Embellishments/Extras:  Beaded Pearls, Sheer Real Red Ribbon, Pearl Basic Jewels, Tasteful Labels Dies


CLICK HERE TO DOWNLOAD THE FREE PRINTABLE TURORIAL


Directions

Cut Whisper White Base at 9” x 8”, score at 4” 

Cut Shaded Spruce at 8 ½” x 3 ½”

Cut (2) Feels Like Frost Designer Series Paper 4 ½” x 1 ½”

Cut Ribbon at 11” and another to make a bow 


Stamp Shaded Spruce Layer and Greeting in Shaded Spruce.  Die Cut greeting. Add DSP and Ribbon Across layer.  Add greeting with dimentionals. Add Ribbon and Pearls and you just made a quick and easy skinny card.  Create many of these quick & easy Christmas Cards for all your friends and family.


Product List 


Make it a Successful Day Beauties!!! ~ Jean Piersanti 
My YouTube Channel: http://www.youtube.com/stampinupgirl 
Post May Contain Affiliate Links

10/27/2020

Floating Clear Card - New Stamping Trend Alert - A Stampin' Up! Demonstrator's Technique Tuesday

Beauty and the Stamper’s Technique Tuesday

Free Floating Clear Card

Order any items in this tutorial at my online store: https://JeanPiersanti.StampinUp.net


Supplies


Stamps:  So Sentimental


Ink/Coloring:  Pool Party


Cardstock/Paper: Whisper White, Pool Party, Laminating Paper


Dies: Detailed Hearts Dies, 2” Circle Punch, 2 ¼” Circle Punch


Adhesives: Stampin’ Seal +


Embellishments: Blue Adhesive Backed Gems


CLICK HERE TO DOWLOAD THE PRINTABLE TUTORIAL


Directions

Cut Laminating Pouch at Base at 5 ½” x 8 ½”, ( score at 4 ¼” with a laminating machine)

Die Cut Detailed Hearts Die and place in laminating pouch and run through laminating machine. Fold in half and run through again.

Stamp Greeting on whisper white then punch with 2” Circle

Punch (2) Pool Party and (2)Whisper White with 2 1.4” punch


Take your Laminated Clear Floating Heart base and attached Pool Party Circle on front, then layer greeting.  On inside attached white circle (behind front flap circle). Attached back circle to line up with white circle. Admire your card and take time to breathe, because this card will take your breath away.


Product List

Make it a Successful Day Beauties!!! ~ Jean Piersanti 
My YouTube Channel: http://www.youtube.com/stampinupgirl 
Post May Contain Affiliate Links

10/23/2020

Free Tutorial Friday - Christmas Card Fun Fold

Beauty and the Stamper’s Free Tutorial Friday

Don’t Stop Believin’ - Fun Fold


Order any items in this tutorial at my online store: https://JeanPiersanti.StampinUp.net


Fun Fold Inspired by Patty Bennet

Supplies


Stamps:  Don’t Stop Believin’


Ink/Coloring: Memento Tuxedo Black, Various Stampin’ Blends (Real Red, Gray Granite, Balmy Blue, Petal Pink)


Paper: Whisper White, Granny Apple Green, Heartwarming Hugs Designer Series Paper (DSP)


Adhesives: Stampin’ Seal, Stampin’ Seal +, Foam Adhesive Sheets


Embellishments/Extras:  All the Trimmings Ribbon Combo Pack, Jingle Bells, Wink of Stella (optional)


 CLICK HERE TO DOWNLOAD PRINTABLE TUTORIAL


Directions

Cut Granny Apple Green Base at 5 ½” x 8 ½”, score at 4 ¼” and at 5 ¼”

Cut (2) Whisper White for Outside and Inside 5” x 2 ¾”

Cut Designer Series Paper 3” x 5 ¼” 


 Fold 1”and add ribbon, then glue down. Add DSP.  Stamp Santa and greetings.  Adhere inside Greeting.  Color Santa, and add wink of Stella (optional). Adhere outside greeting with Foam Adhesive Sheets.  Tie Ribbon in square knot then add Jingle Bells with knots at each end.  Create many of these quick & easy Christmas Cards for all your friends and family.


Product List


Make it a Successful Day Beauties!!! ~ Jean Piersanti 
My YouTube Channel: http://www.youtube.com/stampinupgirl 
 Post May Contain Affiliate Links

10/17/2020

Dollar Tree DIY - Let's Glam up a Pumpkin

Hi Beauty~

Happy Saturday to you!  Weekends are made for DIY's, so today,  I thought I'd show you how I made this already cute pumpkin into a glamorous bougie pumpkin.  


I think it turned out gorgeous!  What do you think?  

It's pretty self explanatory, but you know me, here is a detailed video, for you, just in case!!!


Make it a Successful Day Beauties!!! ~ Jean Piersanti 
My YouTube Channel: http://www.youtube.com/stampinupgirl 
Post May Contain Affiliate Links

10/16/2020

Quick & Easy Hand Stamped Card - Free Tutorial Friday

Beauty and the Stamper’s Free Tutorial Friday

Happiest of Birthdays - Masculine


Order any items in this tutorial at my online store: https://JeanPiersanti.StampinUp.net


Supplies


Stamps:  Happiest of Birthdays


Ink/Coloring: Basic Gray


Paper: Whisper White, Gray Granite, Magic in the Night Designer Series Paper (DSP)


Adhesives: Stampin’ Seal, Stampin’ Dimensionals


Embellishments/Extras:  Crinkled Seam Binding Ribbon, Metallic Pearls


CLICK HERE TO DOWNLOAD PRINTABLE TUTORIAL


Directions

Cut Gray Granite at 4 ¼” x 11”, score at  5½”

Cut Whisper White for Inside 4 ¾” x 3 ½” and scrap for outside greeting

Cut Designer Series Paper 4” x 5 ¼”


Wrap Ribbon around DSP, Tie in knot and adhere to base. Stamp Inside and outside greeting cut outside greeting down to ⅛” border around stamped image. Adhere Vellum on diagonal at an angle at ribbon knot. Add greeting with dimensionals.  Add Metallic Pearls on four corners of DSP and one on the dot in greeting.  Now it’s ready to give this card to your  friend on their birthday.


Product List


Make it a Successful Day Beauties!!! ~ Jean Piersanti 
My YouTube Channel: http://www.youtube.com/stampinupgirl 
 Post May Contain Affiliate Links