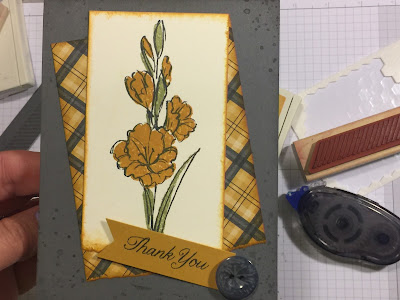
One of my sweet friends, gave me a hostess stamp set from Stampin' Up! It was truly a "Gift of Love". So, I immediately fell in love with the stamp and of course, the wonderful idea of such a nice friend. So, Here is the card that I made along with a how to video tutorial. It was quick, simple and pretty fast (as you will see, I just made the card up, as we go along the video journey together.
Isn't this a great flower? The whole stamp set is just perfect! Thank you Jennie, for such a kind and thoughtful gift!
If you are thinking that you may want to try rubber stamping, but not sure where to start, then you have found the right place. Here is a list of just a few items, that I believe are the basic needs to start rubber stamping.
Of course, first thing you will want is to choose a set of stamps that you like. After you find the stamp or stamps that you want to use, you will want to gather the following items:
Cardstock Paper
Ink Pad
Scissors and/or Paper Trimmer
Adhesive (double sided tape, glue etc.)
With the above items you can be well on your way to letting your artistic mind put to paper. I have made this video showing these items as well as some other tools that will help you embellish your card.
The card in this video shows just how very easy, very quick and as you have seen, simple enough for a beginning stamper. Here is the list of all the items I used to make this card. In case you would like to order them and start your stamping journey! Click Here to Order
Whisper White Cardstock - 100730 Memento Black Ink - 132708 Snail Adhesive - 104332 *Clear Block (E) - 118484 Stampin' Trimmer - 126889 Grid Paper - 130148 Flurry of Wishes Stamp Set - 139732 Happy Ornament - 142175 Fancy Frost Sequins - 142519 Dapper Denim Cardstock - 141414 Dapper Denim Ink Pad - 141394 Fine Tip Glue - 138309 Stampin' Dimensionals - 104430 Stampin' Scrub - 126200
I have been "homeschooling" my three year old grandson for the past couple months and we have really had a good time. A couple weeks ago, we decided to recycle an old jar into a pumpkin. Here are the results and the super easy directions, even a young one can do it!