Showing posts with label Festive Corners. Show all posts

9/15/2020

Let's Make a Handstamped Card - Technique Tuesday - Mirror Technique

Beauty and the Stamper’s Technique Tuesday

Mirror Technique

Order any items in this tutorial at my online store: https://JeanPiersanti.StampinUp.net


Supplies


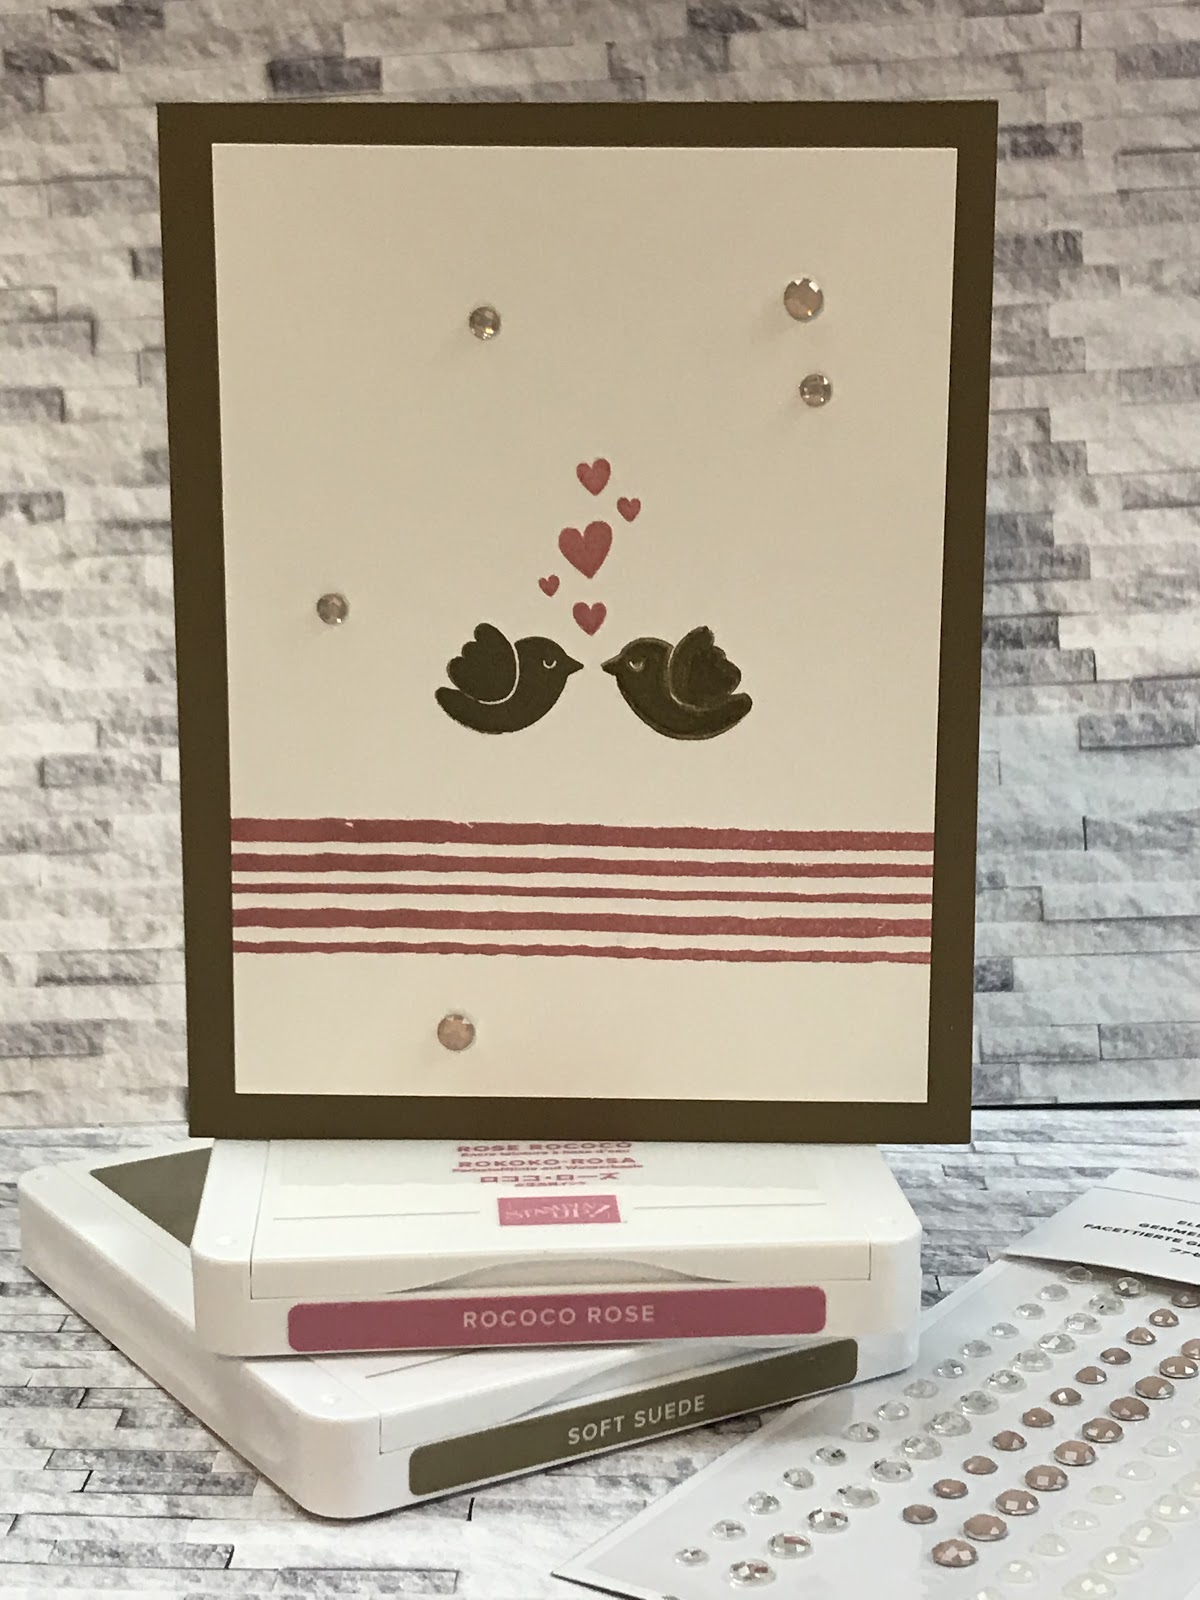
Stamps:  Banner Year, Festive Corners, Pattern Play


Ink/Coloring:  Rococo Rose, Soft Suede


Cardstock/Paper: Whisper White, Soft Suede


Adhesives: Stampin’ Seal, Stampin’ 


Extras & Embellishments: Silicone Craft Sheet, Elegant Faceted Gems


CLICK HERE TO DOWNLOAD PRINTABLE TUTORIAL


Directions

Cut Soft Suede Base at 5 ½” x 8 ½”,  score at 4 ¼””

Cut (2) Whisper White Thick Cardstock at 5 x 3 ¾” 


Stamp as desired, then achieve mirrored look by stamping on the silicone mat and placing opposite of riginal stamped image to get a mirrored image.  Finish by layering all pieces onto card base (dimensionals optional) and finish with rhinestones to complete.


Make it a Successful Day Beauties!!! ~ Jean Piersanti 
My YouTube Channel: http://www.youtube.com/stampinupgirl 
Post May Contain Affiliate Links

8/09/2020

Halloween Treats using Dollar Tree Candy and Stampin' Up! Supplies

Beauty and the Stamper’s Free Tutorial

Trick or Treat - Candy Treat


Order any items in this tutorial at my online store: https://JeanPiersanti.StampinUp.net


Supplies

Stamps: Festive Corners, Tags, Tags, Tags


Ink/Coloring: Memento Tuxedo Pumpkin Pie


Paper: Whisper White, Pumpkin Pie, Basic Black


Adhesives: Multi-Purpose Glue, Stampin’ Seal +, Stampin’ Dimensionals


Embellishments:  Trio Of Tags Dies, Old World Paper Embossing Folder, Crinkled Seam Ribbon


CLICK HERE TO DOWNLOAD PRINTED TUTORIAL


Directions

Cut Pumpkin Pie  6” x 9 ½”, score at 2 ½”, 3 ⅜”, 6 ¾”, 7 ⅝”

Cut Whisper White at  3 ⅛”  x 5 ¾””

Cut Basic Black at 1” x 9 ½”


Wrap Pumpkin Pie around the Candy, Stamp on Whisper White, then add spider web with basic black marker and run through cut & embossing machine with 3D Folder, Stamp and Cut tag and pumpkins with Die in the same machine. Decorate ribbon with your stamp of choice.  Layer all pieces together to decorate.


Product List

Paper Snips
[103579]
$10.00


Make it a Successful Day Beauties!!! ~ Jean Piersanti  
My YouTube Channel: http://www.youtube.com/stampinupgirl 
 Post May Contain Affiliate Links

8/07/2020

Let's Make a Farmhouse Style Shaker Card - FREE Tutorial Friday

Beauty and the Stamper’s Free Tutorial Friday

Farmhouse Style Sunflower Shaker


Order any items in this tutorial at my online store: https://JeanPiersanti.StampinUp.net


Click HERE to PRINT and SAVE Printable Tutorial


Supplies

Stamps: Jar of Flowers, Festive Corners, Buffalo Check


Ink/Coloring: Memento Tuxedo Black, Bumble Bee, Various Stampin’ Blends


Paper: Whisper White Thick, Bumblebee


Adhesives: Multi-Purpose Glue, Stampin’ Seal, Stampin’ Dimensionals


Embellishments:  Jar Punch, Sequins for Everything


CLICK HERE TO WATCH THE CREATE ALONG VIDEO


Directions

Cut Bumblebee Base at 4 ¼” x 11”, score at 5 ½”

Cut 2 Whisper White at  4”  x 5 ¼””

Whisper white scraps at  2”  x 3” (stems) & 3”x3” (flowers)


Stamp greeting and Buffalo Check onto white layer.  Stamps and color flowers and fussy cut.  Stamp and color stems. Punch where you want to place the shaker dome.  Attached Ribbon before placing dome. Fill dome with sequins and attached stems layer., Place and layer stamped pieces with dimensionals, add bow to ribbon and place additional sequins.


Product List
Jar Punch
[152703]
$18.00
Paper Snips
[103579]
$10.00


Make it a Successful Day Beauties!!! ~ Jean Piersanti  
My YouTube Channel: http://www.youtube.com/stampinupgirl 
 Post May Contain Affiliate Links